Showing posts with label dinner. Show all posts

Monday, January 20, 2014

Bengali moong dal | Bhaja Muger Dal

Ever since the Bengali Cholar Dal from Dassana's blog was declared a hit at the dinner table, I have been on the lookout for other similar Bengali dishes to break the monotony of the regular tried and tested dals. That's when I chanced upon the Bhaja Muger Dal. This Bengali Moong Dal recipe makes use of fried moong dal. Bhaja in Bengali means "fried". Moong dal is much easier to digest in the night, compared to the channa dal in Cholar Dal, making it a winning combination with roti for dinner. So if you are bored of the regular dal fry or dal tadka and want to try something new, then Bhaja Muger Dal is an excellent option.
After trawling a few bengali cooking websites, I found that the tempering was similar to the cholar dal. So I decided to follow Dassana's recipe itself. It's just got a handful of ingredients going into it. What's more, it is really simple to make and has its distinct taste that comes from the roasting and the tempering.
Bengali Moong Dal

So how does one make the Bhaja Muger Dal ? Here's how.

Preparation Time: 5 minutes
Cooking Time: 30 Minutes
Serves: 4

Ingredients for the Bhaja Muger Dal

1 cup of Moong Dal
2 tbsp ghee / clarified butter
1 bay leaf
1 pod cardamom
2 dry red chillies ( I used the byadgi variety)
1 inch cinnamon stick
2 cloves
1/2 tsp jeera / cumin seeds
A large pinch of turmeric powder
A large pinch of asafetida (optional)
1 inch ginger grated
Salt to taste
Sugar to taste

How to make Bhaja Muger Dal

In a wide pan, add a tbsp of ghee and roast the moong dal in it, till it imparts a nice aroma. This will take about ten minutes. Do not let the dal burn or brown. So that means, giving ten minutes of your undivided attention to the dal, since once this is done, you are pretty much set with your dal. 
Now pressure cook the dal with enough water in a pressure cooker. I cook for two whistles on low flame and then a third on high. It takes about ten minutes to cook a cup of dal.
bhaja muger dal tempering

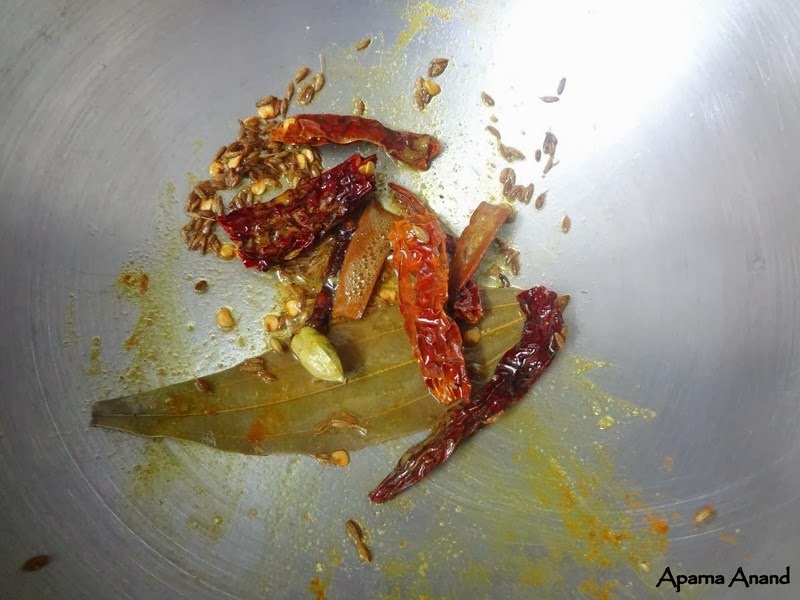
While the pressure in the cooker subsides, you can get started with the tempering. Heat the remaining ghee in a pan and throw in the cloves, cardamom, cinnamon and bay leaf into it. Once their fragrance starts wafting out, add in the rest of the dry spices - jeera, chillies, turmeric and hing. Fry for a minute.
bhaja muger dal tadka

Now top this with the cooked dal. Season with salt and a little bit of sugar. Grate in about an inch of ginger into it. Of late, I have started adding the ginger towards the end of the cooking rather than the beginning. That way, the ginger does not get stuck to the bottom of the pan and its fresh taste is more prominent in the dish.
bhaja muger dal

Simmer for five minutes. Given the presence of spices like cardamom and cinnamon, this dal tends to be a little on the sweeter side. You can up the hotness of the dal by increasing the number of chillies going into it. 
Once all the flavors come together, turn off the gas and serve it hot with phulkas or rice. I served it with methi rotis and a carrot-ridge gourd sabzi on the side. 
bhaja muger dal dinner


Wednesday, January 1, 2014

Under 15 minutes Beans Carrot Poriyal

I love the beans and carrot combination in curries, gravies and rice preparations, especially because of the color. I make this quick poriyal on the day I do my grocery shopping - when the veggies are fresh from the market. I normally cube all the carrots and slice the beans small, use some for the poriyal and freeze the rest to use it up on one of the days of the week. That way, any cooking with these veggies gets done really fast.
So what goes into this poriyal? Nothing much actually - just the veggies, some seasoning and grated coconut on the top. I make this coarse powder out of roasted jeera and pepper in small batches lasting a week which i sprinkle on top of this poriyal. The powder can also be used in the tadka for rasam to make it hot and peppery.
Preparation Time: 5 Minutes
Cooking Time: 10 Minutes

Ingredients 

1 cup carrots, cubed
1 cup beans, sliced in small rounds
1 tsp of cumin-pepper powder
2 tbsp of grated coconut
salt to taste

for the tadka:

1 tbsp of oil
1 sprig of curry leaves
2 red chillies
1/2 tsp mustard seeds
 a pinch of asafetida

Method

Chop the veggies fine and take them in a microwave safe bowl. Sprinkle some water on it.
Now, microwave on high for 2 minutes. This will help in semi-cooking the veggies. In the meanwhile, heat oil in a pan and wait for it to get hot. Throw in the mustard seeds followed by the curry leaves, red chillies and hing.


Once the mustard starts spluttering, add the microwaved vegetables to the pan and mix well. Sprinkle some more water if needed and cover and cook for 5 minutes on medium-high. Remove the cover, add the salt and on high flame, let the curry roast until almost dry for another 2 minutes. Now sprinkle the coconut and cumin-pepper powder from the top.


Toss it well. That is it! Done in 15 minutes flat! Serve it hot with either roti or rice. If it is rice, you are going to need a dal or sambar on the side. I served my carrot beans poriyal with phulkas and it made an awesome combination.


P.S. Sending this as my entry to Healthy Veg Side Dishes event hosted by Nandoo and Priya

Monday, December 30, 2013

Under 15 minutes hakka noodles

There are days when there is very little left over from lunch and I am either too lazy or too caught up with other things to whip up the whole roti + dal/vegetables and raita dinner. On one such days, the husband asks me, why don't you ever make hakka noodles? Well, maybe because I have never made it before, maybe because the sight of the over oily hakka noodles at the restaurants got to me and I was plain not interested in making it. But seemed like it was something that he liked. So the next supermarket visit involved picking up a packet of Chings hakka noodles and a bottle of soy and green chilli sauce each.

When I went through the procedure, I was in for a nice surprise. There was hardly anything to the recipe. And now I make it often, on my lazy days and we happily follow it up with some curd rice and complete the meal. So here is how I make Hakka Noodles in less than 15 minutes. It will take you lesser time if you don't skimp on pots and pans. I do all the cooking in the same pan which doesn't let me do parallel processing.

I make it with very little oil. You may call me a killjoy, but I like it this way. Eaten hot, you won't notice the difference.

Ingredients

1 cup of veg - carrots, beans, spring onions, cabbage, capsicum, chopped lengthwise
1 packet of hakka noodles
salt and pepper powder to taste
1 tbsp of soy sauce
1 tbsp of green chilli sauce
2 tbsp of oil

Method

Clean and chop the vegetables lengthwise. I microwave vegetables like carrot and beans for a minute since I don't like them too raw in the noodles.

Next, in a pan, heat 1 tbsp of oil and add to it the onion (i used the onion from the spring onion) and capsicum. You can add minced garlic to this if you want. On high flame, saute this well. Add to this the microwaved vegetables and stir.

In the end, sprinkle the chopped spring onion shoot from the top. To this, add the soy sauce and green chilli sauce. Mix really well. All of this is done on really high flame. Turn off the gas and remove the vegetables in a bowl.


In the same pan, heat sufficient amount of water and cook the noodles as per pack instructions. I add some oil to the water itself to prevent the noodles from sticking. Cook on high flame. It takes less than 2 minutes for them to cook. Turn off the gas when they start frothing up.


Strain it in a colander, run under some cold water to stop the cooking process and add another tsp of oil on it and mix well with your hands to prevent it from sticking. Now, in the same pan, take your prepared vegetables.


Add the strained noodles to this and toss well on high flame. Season with some salt ( the soy sauce already has enough salt and we cooked the noodles also with some salt, so go easy on it) and white pepper powder. Serve hot!


Tuesday, September 24, 2013

How to make Pizza Sauce | Home Made Pizza Sauce

I somehow cannot get myself to call in for pizza delivery on a lazy day. One, those pizzas are loaded with cheese, somehow, eating them leaves you really stuffed and heavy, they come nowhere as close in satisfaction levels as home made pizza and most importantly, why on earth do they charge a bomb for something that doesnt cost so much to put together!
So I mostly make the pizza at home and it turns out real good! I was resorting to store bought pizza sauces for quite some time now until i realised how easy it is to whip up a really tasty pizza sauce. You can make it in bulk and store it up for a week's use, using it for your pizza and pasta. Or make a small batch and use it up the same day! Complete satisfaction from knowing whats in the sauce and totally free from preservatives!

Preparation Time: 10 Mins
Cooking Time: 10 Mins
Difficulty: Easy!
Serves: Two medium pizzas
Ingredients:

3 Large Ripe tomatoes
4-5 pods of garlic, sliced
2 tbs Olive oil
Salt to taste
1.2 tsp sugar
1/2 tsp pepper powder
1/2 tsp herb seasoning- oregano, basil, thyme and onion flakes


Method: 

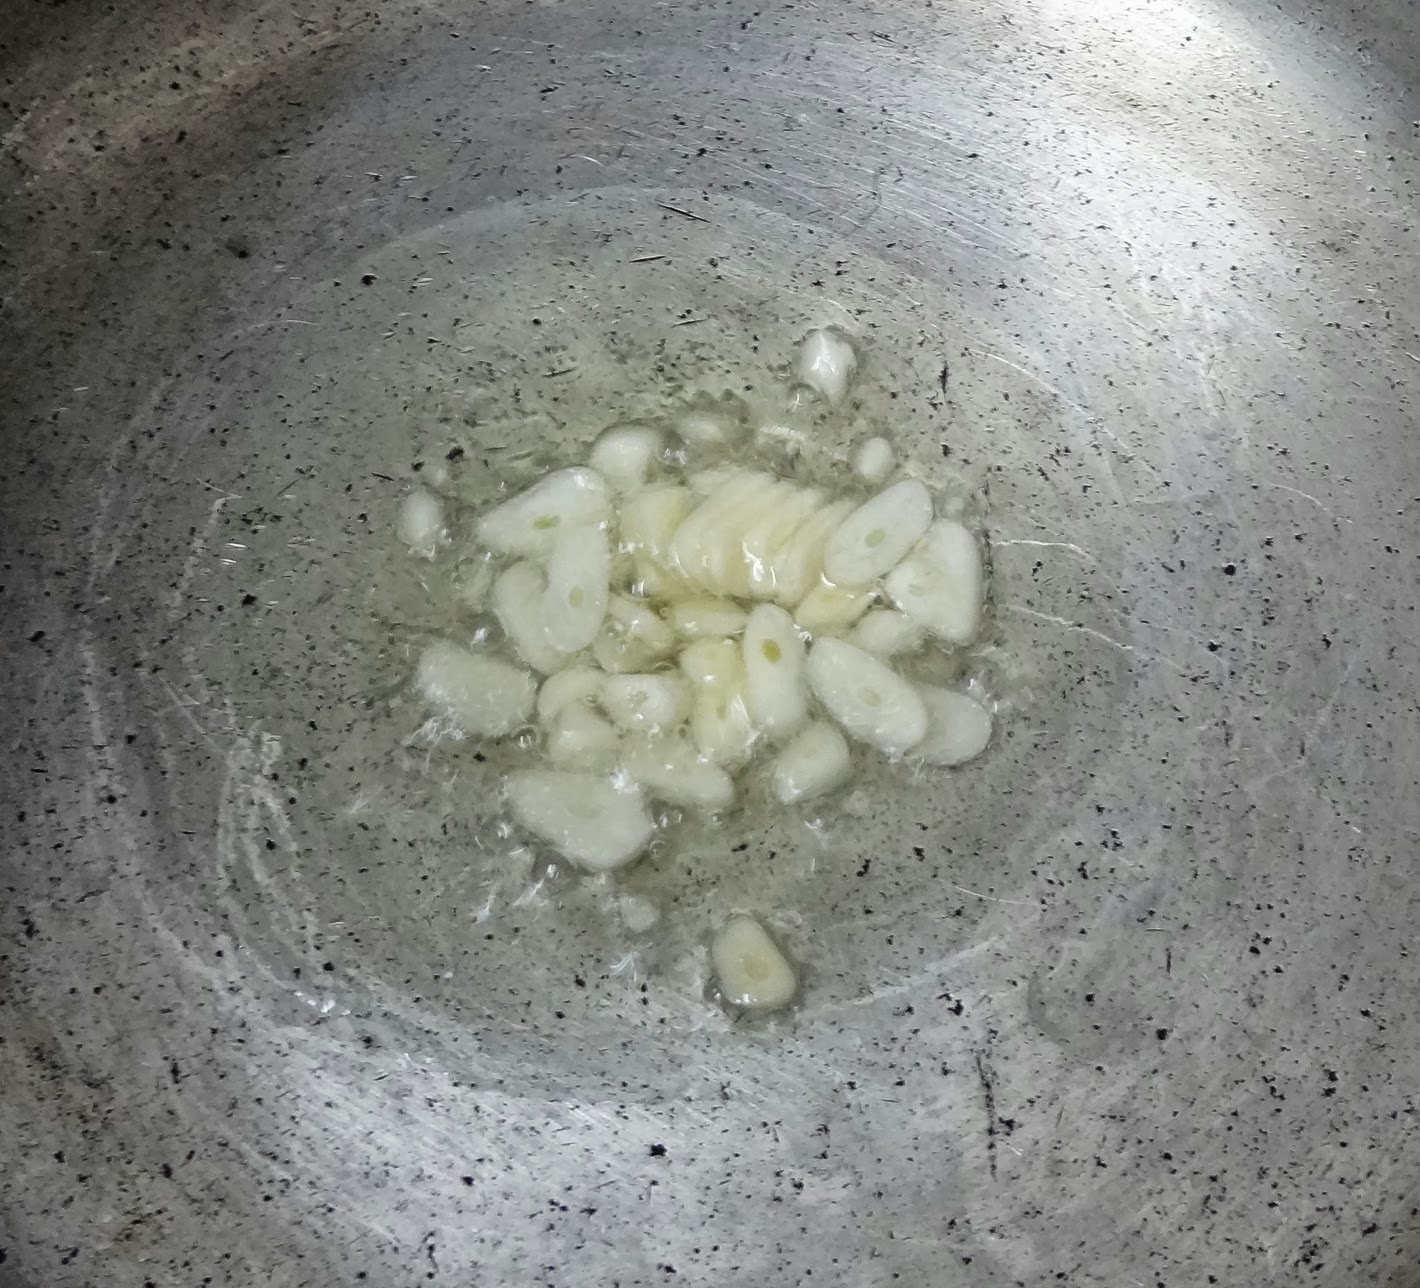
In a pan, heat the olive oil and add the galic flakes and fry them till they brown.


Puree the tomatoes in a mixer. I don't go about straining them. It simply reduces quantity of the sauce. 


Add the tomato puree to the fried garlic. Allow it to simmer and cook.

 Cover and cook for about ten minutes until the quantity is halved. At this point, add the spices and saute it for a minute or two until all the spices come together. Check the seasoning and adjust as per your taste.

I had a sterilized bottle ready to put this gorgeous red sauce in and wanted to admire it in the fridge. But there was just enough sauce to make two medium pizzas that i used up immediately!


Thursday, September 19, 2013

Pumpkin Palak Soup | Pumpkin and Spinach Soup

There has been an overdose of fall pictures and gorgeous looking pumpkin recipes on the internet in the past few days. After ogling at them on pinterest for some time, yours truly ordered pumpkin from bigbasket in the week's grocery, with an intention of making some muffins with them. They got stowed into the back of the fridge and lay forgotten there for a while.
One fine evening, when it was pouring as usual and i felt the need for a warm soup and rummaged through my vegetable box, i found the pumpkin and some spinach side by side. The spinach had to be used up and i was tired of making greens stir fry or dal for three days in a row. And so it was decided that the greens would go into a soup and it would be pumpkin and spinach soup for the night.
There is a mild sweetness that comes from the pumpkin in this soup which is balanced by adding some chilli flakes or red chilli powder. To enhance the flavors, i have used some jeera powder.
I have used a pressure cooker to speed up the process- saute the ingredients in it, pressure cook and dunk the hand blender into the same cooker and puree- it is as simple as it can get!

Preparation time: 10 mins
Cooking time: 20 mins
Serves: 2 Level: Easy

Ingredients:

1 onion sliced
1" ginger sliced
1 cup of chopped pumkin
1 cup of chopped spinach
salt to taste
1 tsp red chilli powder
1/2 tsp cumin powder
1/2 tsp of mixed herbs (thyme, rosemary and oregano)
a dollop of butter or some cream for topping

Method: 

Wash and chop the vegetables that are going into the soup.
 In a pressure cooker, add some butter and saute the onion and ginger in it.

Now add the pumpkin and fry for a few minutes after which you add in the spinach.
Season with salt and chilli powder. Fry until the vegetables are evenly coated in the spices.
Add a cup of water to the cooker and cook for 2-3 whistles on low flame.

Once the mixture cools down, blend it well. I do not strain the mixture. I like to get small bits of veggies in the soup. Now thin it down a little if you want it watery. Add the cumin powder. Adjust the salt. Bring the soup to a boil.
Top it with some butter or cream and season with mixed herbs.
Mix well. Pour into your soup bowls. Serve warm with some toasted bread or roasted papad.

Wednesday, February 13, 2013

Mint Pasta | Lunch Box Series

So like i have written before, since pasta is simple to make and is packed with vegetables, good fat and flavors, it makes a weekly appearance in the lunch box. It is a one pot meal that i can never tire of. Each week it is a different shape and a different sauce.
This week, there was mint in the fridge, left over after making mint chutney. There was the spiralli pasta and some assorted vegetables.
Short of other ideas for the dabba, it was decided that the next day would be the "pasta day". I have never really put too much thought at the measures of ingredients that go into the pasta. It was a learning by trial and error and i continue to cook the same way. I tried to keep a track of what all goes in and in how much quantity in order to write out the recipe. Difficulty level is medium. Anybody who is quick with the knife and can taste and adjust flavors can make decent pasta! And trust me you, once you start making it by yourself, you would never shell out that crazy amount in the restaurants for a single serving of pasta!

Preparation Time: 20 Minutes
Cooking Time: 20 Minutes

Ingredients:

1 1/2 cups Pasta of your choice
Water to boil the pasta
2 tbsp olive oil
1/2 capsicum, finely chopped
5-6 baby corns, sliced into rounds
1 large carrot, cubed
Salt to taste
1 tbsp cream
1 tbsp cheese spread
1 tsp Pasta Seasoning/ Oregano

For the sauce:

3 large tomatoes
1/2 cup of mint leaves
5-6 pods of garlic
Salt and pepper to taste

Method: 

Bring a pot with sufficient water to boil. Add a tsp of salt and a tsp of oil to it. Into the boiling water, add the pasta. Cover, and cook.
On the side, chop and microwave the vegetables that need cooking- the carrot and baby corn here with some water and salt for two mins.

While they are cooking, place the ingredients for the sauce in a mixer and grind well.


Stir the pasta in between and keep checking to see if done. It should be cooked al dente. Takes about 10-15 minutes depending on the brand. Check the instructions on the pack to get a better idea.
Strain it through a colander. Save about half cup of pasta water. Now run cold water on the colander.

In a pan, heat some olive oil and add the chopped capsicum. Fry. By then, the vegetables should be done in the microwave. Add the veggies to the capsicum and stir.

Now add the prepared sauce into the vegetables. Cover and cook for a minute or two. Add the cream and the cheese. I used the Britania Mexican Chilly spread here. While adding salt in any step, be mindful of the salt in the cheese. You can add more cheese if you want a richer, creamier pasta.
Stir in the pasta into it and gently toss, without breaking the pasta.
Add the pasta water to get some more sauce into the pasta. You could add some skimmed milk too. Toss well.
Top with some oregano or the seasoning that comes along with the pizzas, in case you have any.
Serve hot, or pack it for the dabba. I like it both hot and cold!

Thursday, December 27, 2012

One Pot Meal- Khichdi

What is the easiest thing to make after a long day out? Dal and Rice. Easier than that? Put the dal and rice together to make Khichdi :) It is my go to food when i am in a hurry. A lot of people don't like the look of it. But for me, it figures on top of my comfort food list. Hot and spicy, with a big dollop of ghee and my meal is taken care of!
To make it a little more healthy, i add some veggies to it. My Gujarati colleague told me that they normally pre soak the rice and lentils, fry the vegetables separately, and then cook everything together in a big pot. But when you are short of time and don't have the patience to go through any process, it is ok to take a short cut. Here is how i do it.

Preparation Time: 15 Minutes
Cooking Time: 20 Minutes
Difficulty: Very Low

Ingredients: 

There are some basic ingredients that need to go in. Beyond that, you can just add whatever you want. I just chopped up a little bit of this and that of whatever i had.
For the tadka:

Ghee                       1 tbsp
Mustard seeds         1 tsp
Cumin Seeds            1 tsp
Hing                         1 pinch
Turmeric                    1 pinch

Other Ingredients:

Assorted vegetables        1 cup
Rice                                1 cup
Dal                                 1/2 cup
Salt                                 to taste
Green Chillies                 Slit, as per your requirement
Ginger+ garlic                  1 tsp, chopped
Onion                               1, sliced

Preparation:

Wash the rice and dal and keep it aside. I normally use 1:1 mixture of moong and toor dal. Chop all the vegetables that you are putting in. I added potato, beans, capsicum and green peas. You can also add  Cauliflower, brinjal, carrots, double beans- anything goes!
In the pressure cooker, add the ghee and all the tadka ingredients one by one. I had fresh turmeric with me. So i skipped the turmeric powder in the tadka.
Now add the onions and fry well.
Once the onions turn brown, add all the other ingredients except the rice and lentils.
After it all fries for a few minutes, add the washed rice and lentils. Saute for five minutes.Add enough water for the rice and dal to cook. Adjust seasoning. Cover and pressure cook on low for two whistles.
Mash it a little after it is done. Check for seasoning. Add some ghee on top and mix well. Be generous this one time. It is the ghee that enhances the taste. :) Scoop out into a bowl, curl up in your favorite spot and eat a hearty meal!

Wednesday, December 26, 2012

Basil Pesto

I make pasta on a regular basis. One of the main reasons is that it takes very less time to toss a big bowl of pasta. Until now, i always made fresh pasta sauce each time i would cook pasta. Last week, I bought a whole big bag of basil and did not know what to do with it. That is when i set out to make and store Basil pesto. I did not have pine nuts at hand. I knew that the neighboring supermarket had it. But i certainly was not going to buy the pricey pine nuts just to make use of the basil that was going waste. I did not have to look far for replacement. I had peanuts at home! I set out to roasting them and getting rid of the peel. In less than half hour, i had my basil pesto ready, to make pasta a couple of times over!
Preparation Time: 30 minutes
Yield                     : 100 gms of pesto sauce 

Ingredients 

Basil leaves             2 cups packed 
Peanuts                   a handful
Garlic                      3-4 pods
Olive Oil                  2 Tbsp
Salt and pepper       to taste                

That is it. 6 ingredients and you are good to go! 

Preparation:

Wash the basil well and dry it on a kitchen towel or paper napkin.

Dry roast the peanuts and remove the peel. 

Now in a mixer, add the remaining ingredients. 
Give it a whizz. Doesnt matter if a couple of things are coarse. I like to retain a little bit of a crunch while making it. That is all there is to the recipe :) Your lovely green pesto sauce is ready to be used! 
Mix it in with some cheese as you use it. Store in an air tight bottle and keep it in the fridge for upto a week. All you would need it to boil some pasta, saute some veggies in olive oil and seasoning, mix the sauce and cheese and toss everything together! I also secretly spike some of this in my salad for that kick! Just get innovative and maybe even use it as a spread for the sandwich. So many uses and so simple to make! 

Monday, December 10, 2012

Pumpkin and Sweet Potato Soup

I love one pot meals. Khichdi, Bisi bele baath, pasta or a heartwarming soup. With the nip in the air becoming a little too hard to bear, i was craving for something warm and light for dinner. I had a quarter of a pumpkin and one sweet potato. With yellow sunshine in mind, i set out to make a soup with what i had.


Preparation Time: 15 Mins
Cooking Time :      15 Mins

Ingredients: 

Pumpkin                    1 cup, chopped into cubes
Sweet Potato             1 cup, chopped into cubes
Onion                         1 , sliced
Garlic                         3 cloves, sliced
Ginger                        1 inch, sliced
Salt                             to taste
Pepper                        to taste
Cumin Powder            1/2 tsp
Lemongrass                 a few sprigs
Milk                            half a cup
Water                         1 1/2 cups

Preparation:


Chop the ingredients as mentioned above.


In a pressure cooker, add some olive oil and some butter. Add in the ingredients shown above and saute for a few minutes.
Now add the diced pumpkin and sweet potato and toss. Add the water, salt to taste and the lemongrass.

Cover and pressure cook on low flame until two whistles. Let it cool. Once it has cooled, take off the lemon grass, add the veggies with the stock to a mixer and puree it well. It should have a smooth consistency. 
Now in a deep pan, add in the vegetable puree, some pepper powder and cumin powder.

Let the mixture boil for a minute. Lower the heat and mix in the milk. Give it a stir and turn off the heat.
Transfer the hot soup into your bowl. Top it with a basil leaf. Serve with any bread of your choice or khakhra. Enjoy your soup - a little sweet from the veggies, hot from the pepper and zingy from the ginger.

Thursday, November 29, 2012

Masala Chapathi

I had leftover roti dough in the fridge that i was planning to use tonight for making phulkas as usual. Suddenly i was reminded of a sindhi dish called Koki that my friend had made a couple of days back and posted about. It was a really simple recipe with not too many ingredients. I decided to use the existing chapathi dough that i had and extend it by adding the other ingredients. I have adapted the recipe from Jyothi's Sindhi Koki recipe and made what i called the Masala Chapathi.

Preparation Time     5 Mins
Cooking Time         15 Mins

Ingredients 

Wheat Flour          1 cup
Onion                    1, finely chopped
Coriander Leaves   a few sprigs, finely chopped
Jeera                      1 tsp
Salt                         to taste
Green Chili              2, chopped
Water                     for making the dough
Oil                           for the dough
Butter                      for greasing the chapathis

Preparation


I already had a little bit of the chapathi dough. So what i did was to add the remaining ingredients, a little more wheat flour for binding along with some water and kneaded it well.

Now divide the dough into equal sized balls to make the chapathis. Use some flour and roll out the dough just as you would make the chapathi. On a tava, cook it on both sides on medium heat.

Grease the chapathis with butter. You could use ghee or oil instead. Serve hot with dahi or pickle. Apparently, it can be eaten alongwith tea too. Am gonna try it tomorrow morning :)
For now, dinner is the masala chapathi with rice and a sprouted brown lentils curry.